Sizing and shaping stitches
Sizing controls let you adjust the width, length, and angle of individual stitches to shape your diagram exactly the way you want it. This is what turns a grid of identical symbols into a chart that follows the real shape of your piece.
Sizing mode
Section titled “Sizing mode”Select Sizing in the toolbar to enter sizing mode. Every stitch on the canvas grows a set of small round knob handles that you drag to resize it.
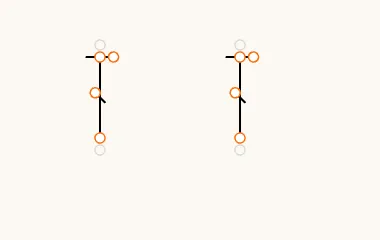
The knobs a stitch shows depend on its type, but they generally cover:
- Leg length — the handles at the top and bottom of the stitch’s main leg. Drag them to make the stitch taller or shorter.
- Width — for stitches with a crossbar or top cap (like a double crochet), knobs on those bars set how wide they are.
Drag a knob to resize; the change applies to that stitch alone, so you can shape stitches individually across a round.
Advanced: angle and position
Section titled “Advanced: angle and position”While you are in Sizing mode, a second button — Advanced — appears next to it. Turn it on to fine-tune the angles and position of a stitch’s bars rather than their length.
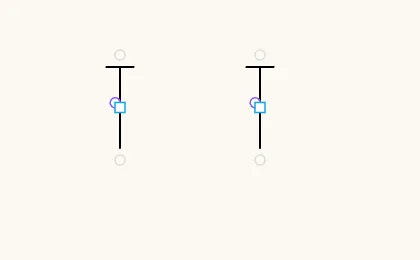
In the advanced view, the handles change shape to show what they do:
- Round handles set an angle — the cap angle at the top of the stitch and the crossbar angle of the diagonal bar.
- Square handles set a position — where the crossbar sits along the leg.
A few things to know:
- Adjustments are offsets from the stitch’s normal shape, so a stitch you never touch keeps its standard look.
- For a taller stitch with several bars (a treble or double treble), tap the stitch to expand it to per-bar handles, so you can angle each bar on its own.
- Right-click a handle to reset it to its default. The reset can be undone like any other change.
Following a guide’s tangent
Section titled “Following a guide’s tangent”When a stitch is snapped to a guide, it can automatically lean to follow the curve of that guide. This is controlled per stitch in the inspector, under Guide tangent:
- Follow guide tangent — On (the default): the stitch’s top angle tracks the guide’s tangent, so a round of stitches fans neatly around a circle or along a curve. While following is on, the cap angle is locked, since the guide sets it.
- Follow guide tangent — Off: the stitch keeps its own angle instead of following the guide, which is useful when you want a stitch to stand straight regardless of the curve it sits on.