Adding stitches
You can add stitches to your diagram by dragging them from the stitch rail onto the canvas, building up rounds and rows one stitch at a time. This page covers placing basic stitches, adding a stitch on top of another, and building increases and decreases.
Dragging a stitch from the rail
Section titled “Dragging a stitch from the rail”The stitch rail down the left edge is where stitches come from.
- Make sure the Stitch tool is selected in the toggle above the rail.
- Press on a stitch icon in the rail — for example Double crochet — and drag it onto the canvas.
- Release where you want the stitch. The stitch appears as its standard crochet symbol.
Dragging is the key gesture: simply clicking a rail icon arms that stitch but does not place anything. Drag out onto the canvas and drop to add a stitch.
The rail shows your common stitches directly. For everything else — treble and taller stitches, front- and back-post stitches, textured and special stitches — select All stitches to open the full library. It has a search box and category tabs (All, Basic, Posts, Clusters, Textured, Special). You can drag a stitch straight out of the library, or pin a stitch to the rail so it is always one drag away.
Adding a stitch on top of another
Section titled “Adding a stitch on top of another”Real crochet is worked into the stitches below, and the editor mirrors that: you can add a new stitch directly on top of an existing one, which links the two together.
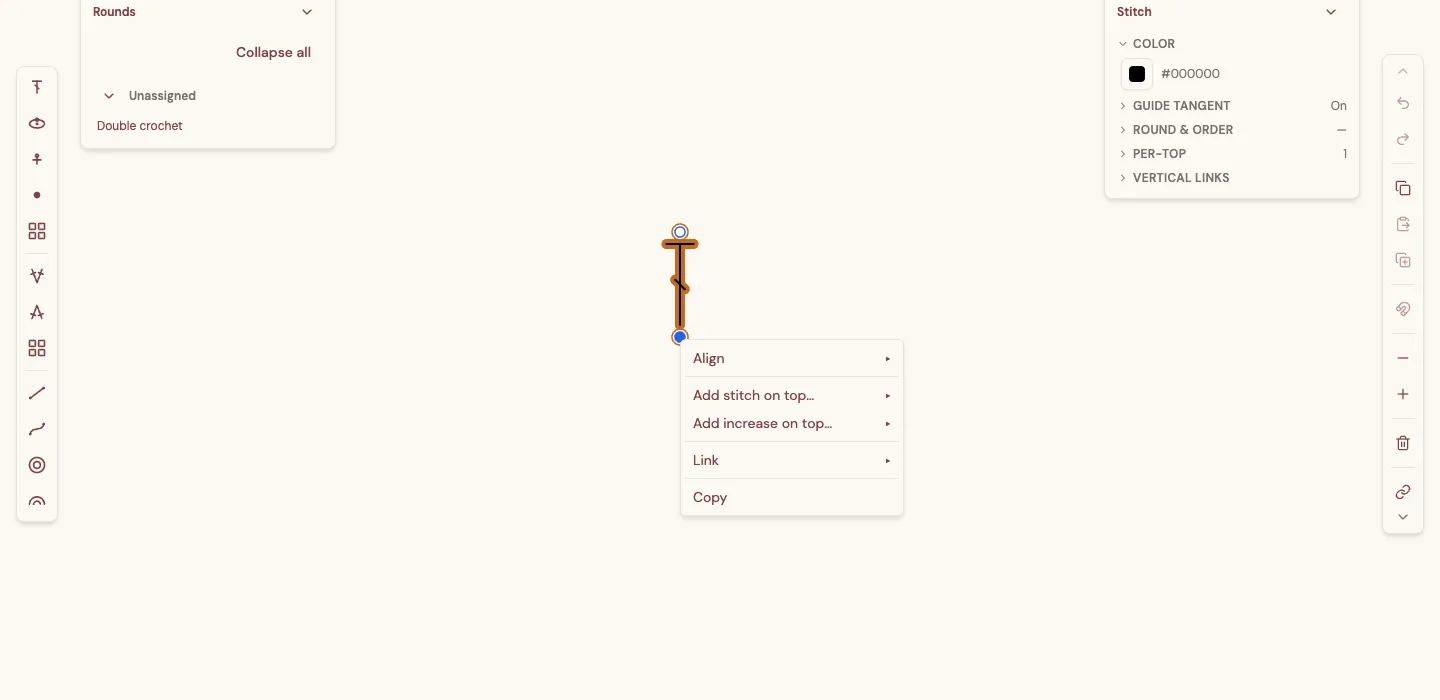
- Select the stitch you want to build on, making sure its top handle is part of the selection — marquee around the whole stitch, or around just its top ring.
- Right-click (or long-press on a touch screen) the stitch to open its menu.
- Choose Add stitch on top… to add a single stitch, or Add increase on top… to add an increase, then pick the stitch type.
If the Add … on top items are grayed out, the top handle is not in your selection — reselect and include the top ring.
Increases and decreases
Section titled “Increases and decreases”An increase works two (or more) stitches out of one base; a decrease joins two (or more) stitches into one top. Both are built with a short click sequence rather than a single drag.
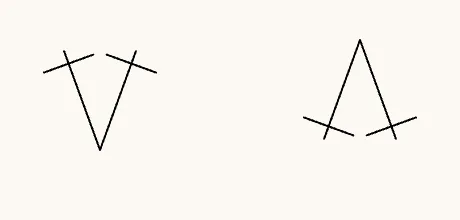
- Select Increase — single crochet or Decrease — single crochet on the rail. (Use All increases & decreases to choose a different stitch type — double crochet, treble, post stitches, and so on.) The editor switches to Place mode.
- Click the canvas to set the shared end: for an increase, the first click places the shared base; for a decrease, it places the shared top.
- Click again for each stitch that fans out from it — two clicks for a standard 2-into-1 increase or 1-into-2 decrease.
- Press Enter to confirm. Press Esc at any point to cancel.
Chains and rings
Section titled “Chains and rings”A chain is just another stitch on the rail — drag it out like any other, and place several in a row to make a chain of the length you need. There is also a Chain mode in the toolbar for moving and rotating a chain guide.
For work in the round, use the Guide tool (the toggle above the rail). It offers foundation shapes — a line, concentric circles, a magic ring, concentric arcs, and a Bézier curve — that you lay down first and then work stitches along or around. A magic ring is the classic center start for a round: place the ring guide, then add your first round of stitches around it. To add several evenly spaced stitches along a guide at once, right-click the guide and choose Add stitches….